Our Cookbook Blog

Our Cookbook ~ What We Cook, is a compilation of every recipe we (Janice and Carissa) cook - recipes from our cookbook collections, our recipe boxes, and our heads! We set up this blog for friends and family who have our cookbook to let them see pictures we post of the recipes in the book, and also for us to note any corrections, revisions, or additions to What We Cook. We encourage people who are cooking our recipes to let us know how the recipes turn out and any suggestions they might want to make.

In addition, we will be sharing some of our new recipes (along with pictures) that are not in our cookbook. We hope you will help us out and test recipes and give us your comments.
Showing posts with label dessert. Show all posts

Monday, January 24, 2011

Perfect Chocolate Layer Cake ~ page 243

My daughter-in-law, Cathy, just told me she does not usually care for chocolate cake because it is dry--well, believe me, this is not a dry cake at all! But the interesting thing is, neither is it loaded up with butter and oil to keep it moist. There is just a modest amount of oil in the recipe. What is different, is that boiling water is added to the batter, and somehow this makes for a moist cake.
I made this cake for my son Matthew's 36th birthday--here he is with his cousin, Nathan, (on the right) and Nathan's girlfriend, Marianna, at Matthew's family birthday party. You know, years ago I remember my mother-in-law always commenting on my husband's birthdays that she couldn't believe she had a son that old. Well, finally I know what she means...all my kids birthdays seems to remind me that they must have a very old mother if they are that old! Ha!
Here is the beginnings of this easy and delicious layer cake...I used a mixture of (expensive) dark cocoa that I love, and a cheaper store brand cocoa--just to get the best of both worlds. I put parchment paper in the bottom of the cake pans, then grease and flour them to make removing the cake a breeze.
The cake batter is very thin after you add the boiling water--but don't worry, it all comes out perfect in the end.
Look at this face...don't you know what she is asking for!
Finally, the cake is iced--dig in girl!
Fulfillment.

Saturday, January 1, 2011

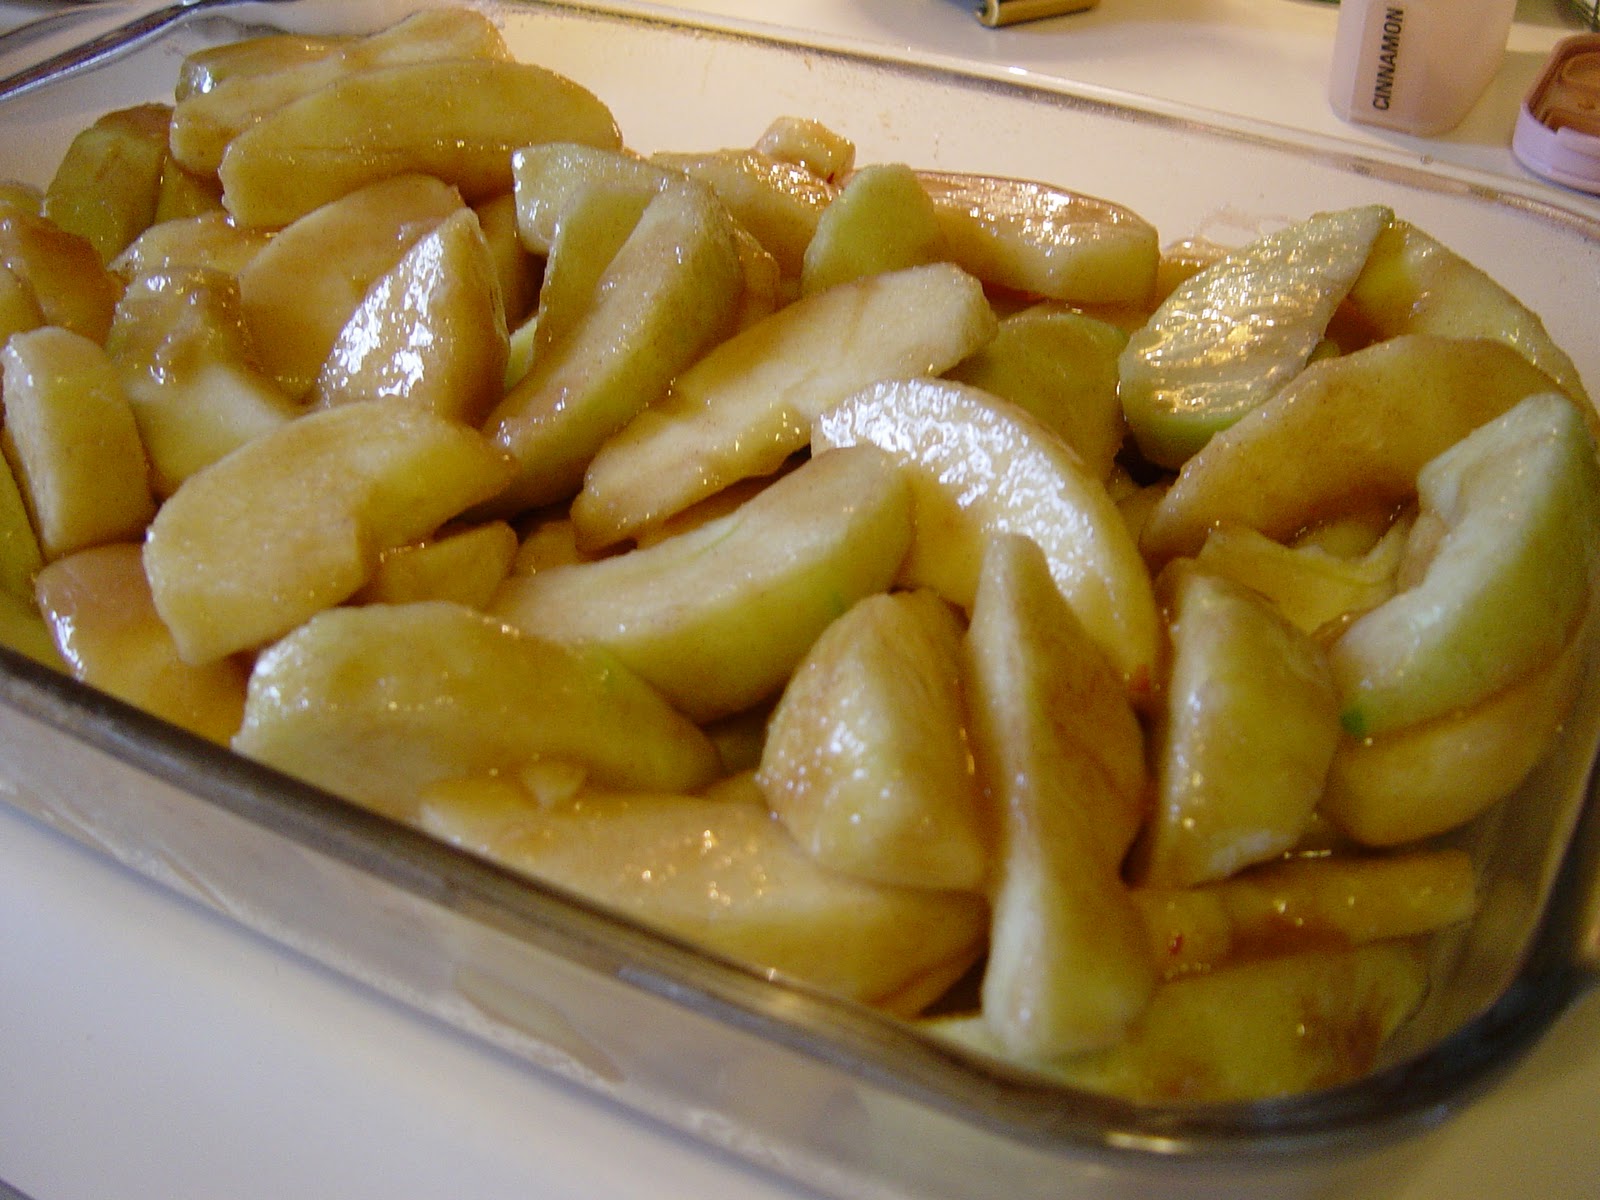
Amazing Apple Crisp ~ page 246

Happy New Year to everyone out there! Here is a dessert to start your year off right.
This was so yummy! I didn't even use tart apples like you are suppose to, and it was still great.
My 3 year old loved the peeling scraps for a snack.
I baked this ahead of time and just let it sit in the turned off oven for a couple hours till I needed it. Then I reheated it for 10 minutes and it was perfect! --Carissa

Sunday, December 12, 2010

Peanut Butter Truffles~ page 224

These little truffles are addictive! I made the "dough" for the middle of the truffles a couple days ahead of time and then when I was ready for them I diced the "dough" into little cubes to roll into balls. These can seem a little crumbly, but just keep rolling till the balls are smooth and round.
Below is what the dipping chocolate looks like....usually comes in an ice cube try thingy.
You just pop a couple out at a time and microwave them 1 minute, stir, then microwave them another 30 seconds or till smooth. I use fondue forks for lifting them out of the chocolate, works like a charm.
They might look a little messy when you plop them down on the parchment paper, but once they harden you can break off any extra chocolate around the edges.
Below is a close up of the middle of one! If that doesn't make you want to make these, then I don't know what will!

Wednesday, December 1, 2010

Apple Pandowdy ~ page 229

This old-fashioned recipe is an easy, fast way to make an apple pie. I suspect that originally leftover scraps of pie dough were used, hence the "messy, or dowdy" appearance.
I made the dough up a day in advance (in the food processor), shaped it into a disc, and wrapped with plastic wrap, then slipped it into a zipper-top bag and into the fridge to chill.
I like to use a selection of both tart and sweet apples. Cut in big hunks--I take each quartered apple and cut it into thirds for thick pieces.
The apples are tossed with a cinnamon, sugar, flour, and lemon juice mixture. Scatter butter slices on the top of the apples.
Roll out the cold dough and cut into 2-inch squares. You don't have to be perfect--this is messy pie, remember!
Lay out your dough pieces on the apples kind of like a patchwork crazy quilt, leaving a few openings for steam. I like to sprinkle the top with sugar for a sparkling appearance.
We served this dessert on Thanksgiving day. This is Miss Emma, Julia's 99 year-old Grandma eating Apple Pandowdy! Miss Emma said it was wonderful! By the way, did you know there is a song about this dish? Ben was singing it at Thanksgiving, "Shoo-fly Pie and Apple Pandowdy". I looked it up, and there is such a song sung by Dina Shore! http://www.youtube.com/watch?v=2HBDnpu5Bl4

Thursday, November 18, 2010

Mississippi Mud Brownies ~ page 239

Think about a cross between a brownie and a piece of fudge...then add just enough creamy marshmallow layer and chocolate drizzle to put you into chocolate dessert heaven...okay, you are getting into the groove of the Mississippi Mud Brownie! This easy brownie is dressed up enough to be a fancy brownie dessert for company. (You will need to have company so you don't eat more than you should...)
Pour the easy to mix batter into a pan lined with aluminum foil, and leave "handles" on the ends of the foil. This makes it where you can lift the cooked and cooled brownie from the dish and put the whole thing on a cutting board for clean, neat cuts.
As soon as the brownie comes out of the oven, you will add a thin layer of marshmallow cream over the top. Blop the marshmellow cream on first, let is sit a minute to warm, then spread it out. This is actually a very thin layer-just 1 cup-of the cream. This gives a nice topping to the brownies, without getting too gooey or overly sweet.
Now drizzle on the melted chocolate...have fun here.
Here is a chocolate drizzle tip I learned from Carissa: Put a plastic baggie over a small glass, then pour in the melted chocolate, seal the bag, then snip off one corner of the baggie. This is a quick and easy way to drizzle chocolate with no mess.
After a couple hours of cooling time, you are ready to take the foil handles and lift the brownie (with the foil) from its pan. If you have one of these tools, called a bench scraper, it makes cutting fast and easy. But a long knife will work well too. These brownies freeze very well in a Tupperware dish. Be careful about putting them in zipper-top baggies though, as the marshmallow and drizzle will smear if it is bumped or touched. Now, pour a cup of coffee (or milk) and enjoy a decadent dessert!

Monday, October 25, 2010

Date-Filled Baked Apples ~ page 252

This is one of my mom's recipes in the cookbook...and it was YUMMY! Knowing that it didn't have any fat in it besides the walnuts made it taste even better! We had some friends over for dinner and she couldn't eat anything with dairy in it. It is hard to find a dessert with no butter, cream, or chocolate in it.. but this was perfect.
Here are the kind of apples that I used...I think they were Gala, but I can't remember. If you don't already own an apple corer..this recipe would be a good excuse to get one. They are fun and easy to use. I slipped this in the oven as we sat down for dinner and they were ready as soon as we were ready for them!
The only thing I would say about the recipe is that I served mine in a bowl with a spoon, the peel on the lower half was a little hard to cut with a spoon. My mom serves hers on a plate with a fork and knife, so the skin isn't an issue. I might peel the whole apple next time, although the peel did taste great too. Lillian (the 5 year old) gobbled hers and half of another one right up!

Thursday, August 19, 2010

Fig Streusel Bars ~ page 233

I really love figs. My grandmother had a fig tree in her yard when I was a girl and that is where my love began. Now I have one in my own yard. Fig trees are beautiful, and oh so handy 2 weeks of the year with all their lovely fig gifts.
My gift was huge this year! This is one of the daily harvests...
These delicious fig bars have two simple steps: cut up and cook the figs with sugar (you don't need much sugar because figs are naturally quite sweet), then mix up the streusel.
The streusel makes up to about 6 cups of topping. Press about 3 1/2 cups into a sheet pan to make the bottom crust--then add the fig filling.
Then sprinkle the rest of the streusel on top.
Fig bars are good for dessert or for breakfast. You can also make this bar with dates, as stated in the recipe. These really are just as good either way, so don't worry if you do not have access to a fig tree. ~Janice

Monday, August 16, 2010

Wonderful Homemade Pie Crust ~ page 265


Fresh peach pie--does it get any better than that! I found peaches for 49 cents a pound the other day, so I just had to make a pie using our pie crust recipe. I worked on this crust recipe for several years trying to find the right proportions of butter and shortening. Years ago, I used all shortening, but I like the richer flavor of butter, plus, I wanted to lower the shortening content because of the trans fats in it. But crust does need some shortening in it or the dough will be very hard to work with, as the butter gets too soft.

I like to make my dough, then  pat it into a 6-inch circle, put it in a baggie, and refrigerate it for 30 minutes or even a day ahead. Then I take it out to roll it while it is really cold. That keeps it easier to work with. This crust did justice to my summer peaches--mmmm, it was very good! ~Janice

Wednesday, August 11, 2010

Chocolate Chip Coffee Cake ~ page 250

This is a very lovely coffee cake that is more like a dessert. There is a typo in this recipe...You really need a bigger pan.... the cookbook calls for an 8x8 pan...that is too small. I made this in a 9 x 13 pan and it was perfect, but instead of baking it 50 minutes like the recipe calls for, do 35-40 min. It should come out perfect. The recipe says you can also do it in a 9 inch spring form pan...if you do this you need to cook it the full 50 minutes that the recipe calls for. I froze it in little squares for Adam to take to work for breakfast. --Carissa

Thursday, July 22, 2010

Orange Glazed Poppy Seed Loaf ~ page 257

This was so good that I ate half of the loaf myself! I added orange zest to my glaze because I was juicing oranges anyway. It added even more orange flavor.
I wanted 3 loaves so I used one large loaf pan and 2 medium pans...the smaller ones are antique baking dishes that I used to collect from flea markets and such.
Above is the glaze with the orange zest that was so yummy! The only thing differently I would do next time is to grease AND flour the pans. The recipe just says greased pans, I had to shake a bit to get the loaves out. I think the original recipe mentions flouring the pans. I have to go stick the other two loaves in the freezer before I eat them too! --Carissa

Friday, July 16, 2010

Easy Sneezy Peaches ~ page 253

I made Easy Sneezy Peaches about a week ago...they were fabulous! But 16 peach halves is alot for 2 people to eat in a weeks time. This morning I was making pancakes and noticed I was about out of syrup. Then a great idea hit me....those peaches in the fridge would make a great topping! So I sliced them, added a sprinkle of cinnamon and then simmered them on the stove to thicken the sauce. Oh my! The topping took the pancakes to the next level. I think I will always do this when I make those peaches. You really do have to try it! I just had to share! --Carissa

Thursday, July 8, 2010

Granita di Limone - Lemon Ice ~ page 255

I made this at Carissa's house last week. It is a nice, light dessert that will satisfy your sweet tooth with no fat calories involved--which she liked.
Zesting and squeezing the lemons is a breeze when you have some cool kitchen gadegets, like a microplane grater, and a lemon squeezer.
When I am at home, I use plastic ice cube trays to make this lemon ice--you just stir up the lemon mixture, freeze it in cubes, then blend it to a smooth consistancy. However, it turns out that Carissa does not own ice cube trays (which means her ice maker on her refrigerator works, and mine does not!). So I remembered a way to improvise: pour the lemon mixture into a 11 x 13-inch glass dish, and put the whole thing in the freezer.
About every 30 minutes, give the icy mixture a stir to break it up.
Once it become fully frozen, it is easy to scoop into a food processor. (If you did not keep stirring it now and then as it freezes it would become a solid frozen block.) If you have ice cube trays, you don't need this extra step of stirring though.
Don't pack it all in the food processor like I did here--it won't work. I had to remove some of the ice, and do it in about 3 batches.
After is all is blended, and becomes like soft wet snow, stir it up (to make sure the lemon zest is distributed) and pack it into a freezer container.
Freeze a couple hours before serving. Lemon Ice will keep well for several weeks in the freezer. This is basically like fluffy frozen lemomade--a perfect summer dessert. I love it served in a pretty stemmed glass.