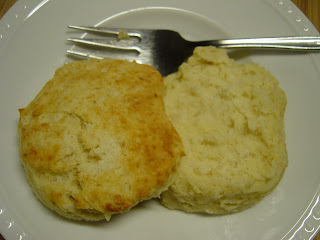
"How to Make Buttermilk Biscuits 101 Tutorial"
I am very picky about my biscuits, coming from a long line of excellent biscuit-makes in my family. It is such a delicate operation for me, that I rarely whip them together in front of friends or family. I almost always make them up ahead of time, cook them about 1 minute less, when they have just the very slightest of color on them, then I cool them and freeze for later. They can be reheated to where they taste like they just came out of the oven! Just thaw on the counter, then put in a 350 degree oven for 8-10 minutes, just till perfect light golden brown with a tiny bit of “crisp” to the crust.
So here goes with all my tips:

 If my kitchen is warm (like in the summer) I often put my cut up butter in the freezer for 10 minutes to make sure it stays very cold. Cold butter is important. Cut the butter and shortening into the dry ingredients. Sometimes I do this in the food processor, and sometimes by hand. It is crucial to light, delicate biscuits that there are still some pea-size lumps of butter in the flour mixture. I have tinkered with this recipe quite a bit to find the necessary proportions of shortening and butter—and as little of the fats as I can get by with and still make a wonderful tender biscuit. The butter makes the biscuit rich, and the shortening makes it flaky and light.
 Here you see I use a pastry cloth and a rolling pin covered with a pastry stocking to keep the dough from sticking, and also it keeps me from using too much flour to roll the biscuits out.
 Stir in the buttermilk, and then scrape the dough onto the lightly floured surface. Give it a light pressing with the rolling pin (no hands!), to flatten a bit, and then fold the dough in half. I like to do this to give the biscuits a natural easy splitting line after they are baked.
  Now lightly roll the dough to ½ to 5/8-inch thick. With a sharp biscuit cutter, make cuts close together.
 You will wind up with a bunch of little scraps. Press these together gently, but do no knead them.
Now cut another biscuit, and then shape, barely pushing any remaining dough into a circular shape.
I like to put a dab of soft butter on the top of the biscuits---because that is what my Granny did with her biscuits! (It does make them brown prettier, too)
If you are baking to freeze, bake less than the recommended time till hardly brown. To serve right away, bake till just light golden. The big no-no is to cook them too long! This will ruin the delicate texture.
Now, serve them with eggs or split ready for jam, or do like my family likes them—serve with sausage gravy and a dot of ketchup! Yummm, so good, just like Granny used to make!


2 comments:
I could almost taste the biscuits! You and your brother should have a biscuit bake-off next time we're in Tyler!!
ha! I would be scared because I fear his might win! I would love to hear his biscuit tricks though. I am sure he has a whole arsenal of them himself!
Post a Comment